Category Archives: Crafting

Crafting and DIY blog post showing step by step sewing, crafting, and creative ideas for home and family

How to make a Terrarium : Succulent Container Garden

a succulent terrariumHow to make a Terrarium : A fun activities for you Family is make Succulent Container Garden terrarium which are great gift. This year we are giving my daughters teacher a succulent garden, that my a daughter made with a little help from me. When I was a little girl my mother who has a amazing green thumb  gave all out teachers spider plants as a gift. She would cut the baby off shoots, pot then and have a plant to give to the teachers. Me : I would kill a spider plant. I ok I have killed a spider plant or 2 in my day, yes I am a plant murderer.
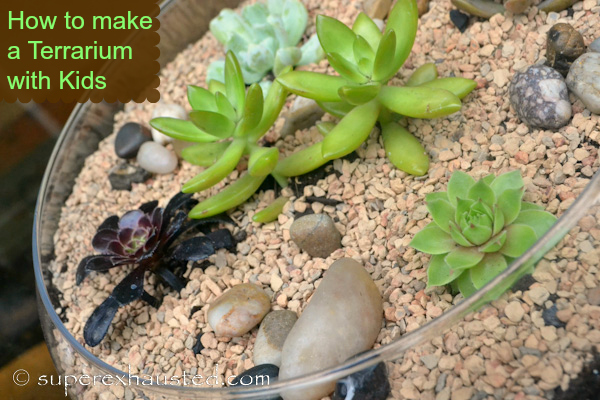
Several months ago 2 of my blogging buddies Diane and Hillary got together and made terrariums.  Mine for a 1st attempt was ok.. I would like to switch out the one plant, kind of a bully to the other plants. The thankful it is still alive, I have not killed the plants.. the fact the Terrarium is it own closed eco system is probably the reason, LOW maintenance.  Succulents are great drought resistance and hardy..Hello come to mama –  I also love the modern look, with clean lines.assorted succulents
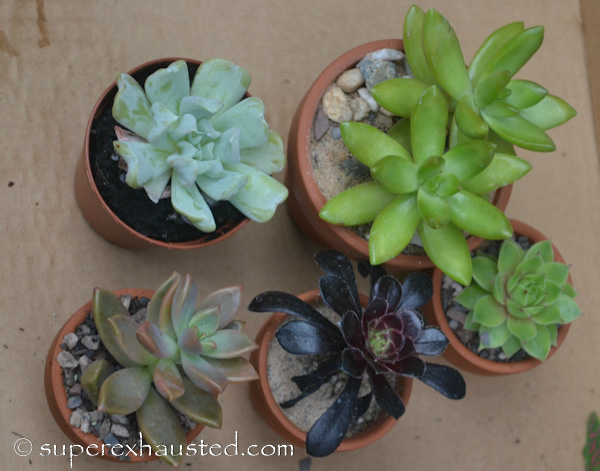
So I decided to make make some more, learning. I love the idea of finding a container and let the container speak to me about the plants. So be sure to check out Local thrift stores and yard sales.  I found this great low bowl at the thrift store it was $2. It said Succulents low and topless.  It was perfect for the low kill rate plant- because I don’t know if her teacher is a green thumb criminal.

So here is how to make a terrarium… 1st find a an excellent garden center- Mine is a local family own business Primex. For your 1st time out it pays to go to people who know what they are doing. Big Box Store not always helpful and supporting a local business.

Facts you need to know about How to make a Terrarium:

Terrarium or Horticultural Charcoal: according to this post on PagHat.com there is a difference in charcoal so don’t use the kind you use in aquariums or what is in your water filter, buy the one specifically for horticulture- My  garden center confirmed his advice and they sold us a small bag of Terrarium /Horticultural charcoal ($1) which was enough for 3 Terrariums.charcole

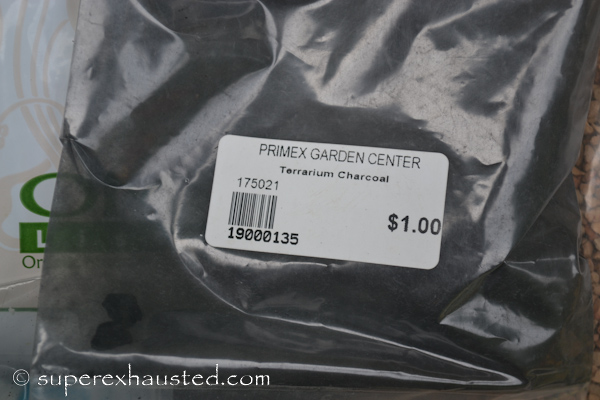
Soil: It was recommend to use an organic soil with no clean and high in organic matter. Packaged potting soil often contains all of the ingredients needed for healthy, thriving terrarium plants. Bagged soil is sterilized, making it ready to use without further preparation.  It was recommend we went with a Peat Free and NO Perlite (white little ball) in the soil.  From my research is because the perlite holds too much water and can allowing microbes to grow. It seams others have a difference of opinion. Clean Sterile soil is the key.

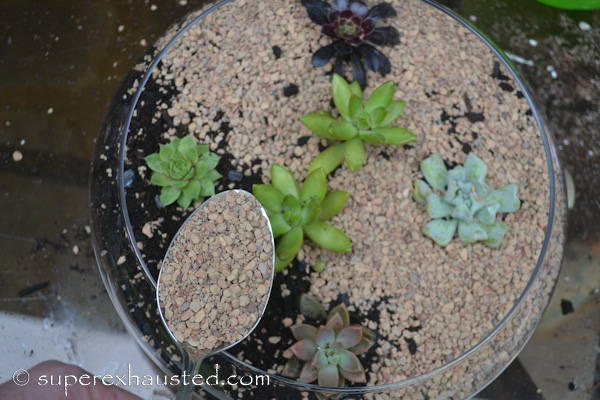
Turface: which is a clay gravel that is fast draining since the Succulents don’t need alot of water this allows for the dry environment. Turface look familiar ? it also use in ball-fields.

How to make a Terrarium :

  • Container to hold your Terrarium
  • Succulents (work with 1, 3, 5- uneven numbers)
  • Soil- perlite free
  • Terrarium / Horticultural Charcoal
  • Turface small bag (i purchased a 5lb I have enough for 3-4 more gardens
  • Pebbles (I got mine at Ikea)
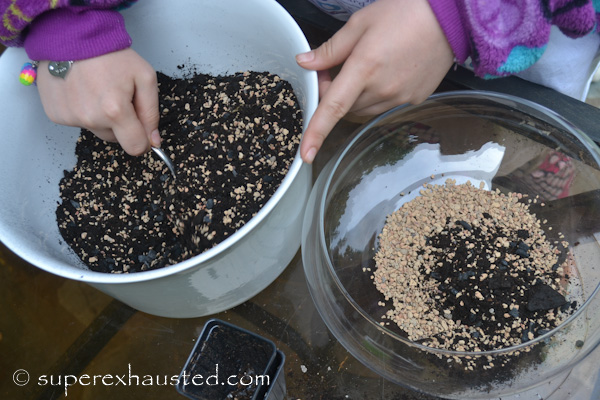
  • Tools: Spoon, mixing bowl,cup
  1. Make sure you container is clean
  2. In separate Mix soil 3 cups of soil; 1 cup of Turface & 1/2 cup of charcoal (make 2  batches if needed – I needed 2 batches roughly)terrarium soil
  3. I placed Turface/or pepples on the bottom of the glass dish (the garden center said not required)making the terrarium
  4. Next soil about 1/2 up the container (so when I planted I did not hit the gravel on the bottom)
  5. Arrange the lay out of the SucculantsHow to make a Terrarium
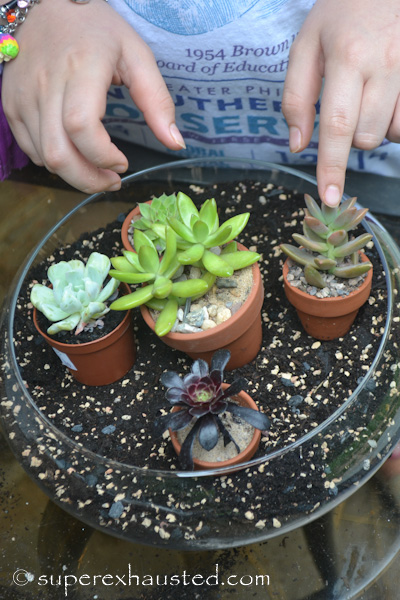
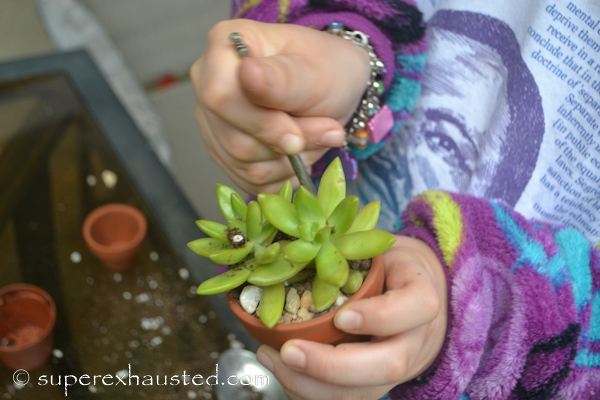
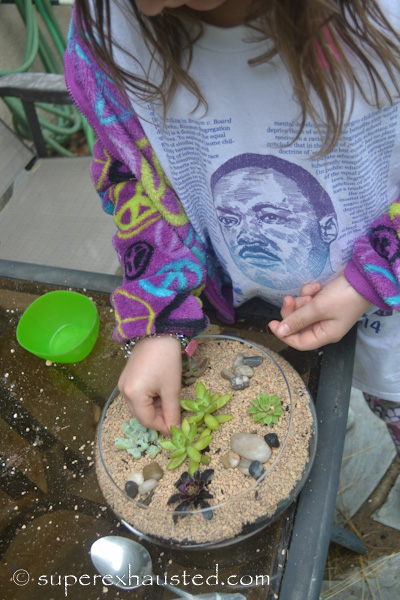
  6. Plant the succulent plants,  some of my plants came in hard terracotta pots so my daughter used a small spoon to loose up the soil, and not damage the rootsplanting succulentsplants planted
  7. Mist soil gently  with a mister to not over water
  8. Add Turface on top with a spoon so as not to get it on the plantsadding turface to succulents
  9. I used a tweezers to remove any of the Turface that got on the plants
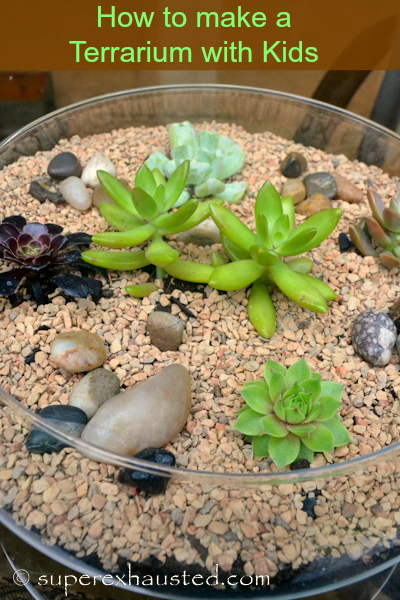
  10. Add decorative stones or items to add to you desert theme – etsy has some or little clean toys from your kids collect try Mini Figures or Poly Pocketsaddting decorative  items to terrarium
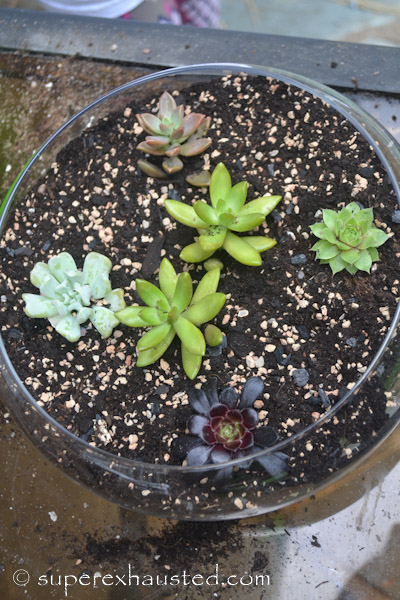
  11. These are little plants but they do have plenty of room to grow.

How to make a terrarium :My Daughter loved Succulent Container Garden for her teacher.   I cant wait to see what it will look like over time.  I hope the teacher will enjoy it.

How_to_make_a_terrarium_013_001-2-23

The project cost me $2 container, $11.00 soil/gravel/charcoal (enough to do 3) , $15 for the plants.  The total cost $20 each if you were to buy one it would be $70

Check out my other Fun Activities:

Making colorful Pancake Art with the kids

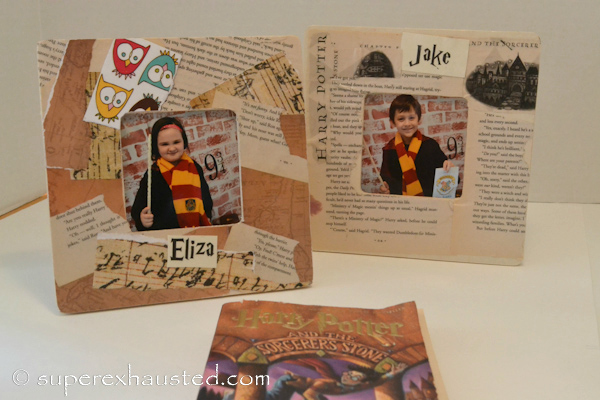
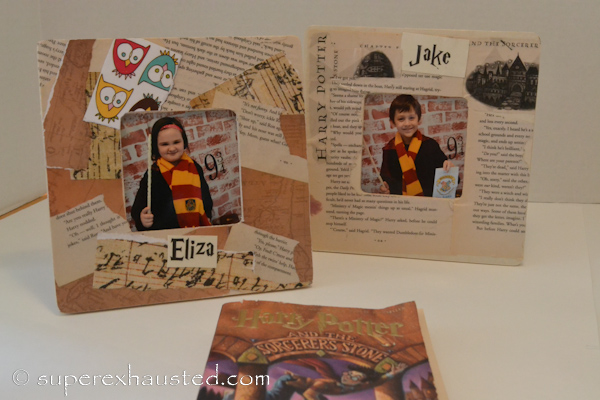
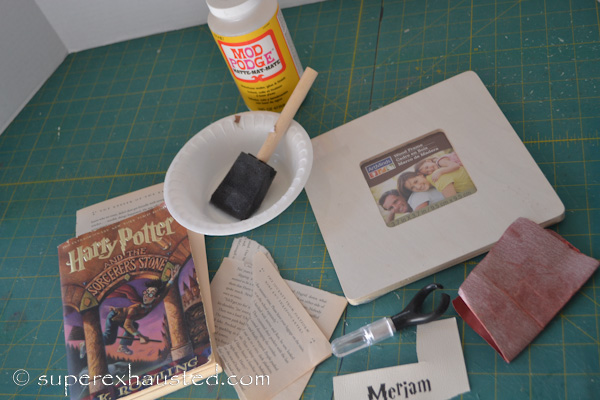
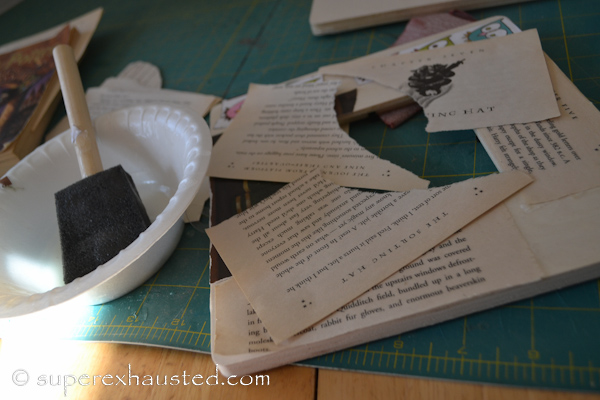
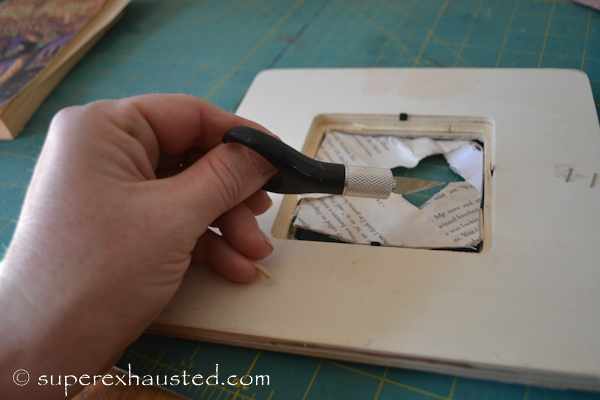
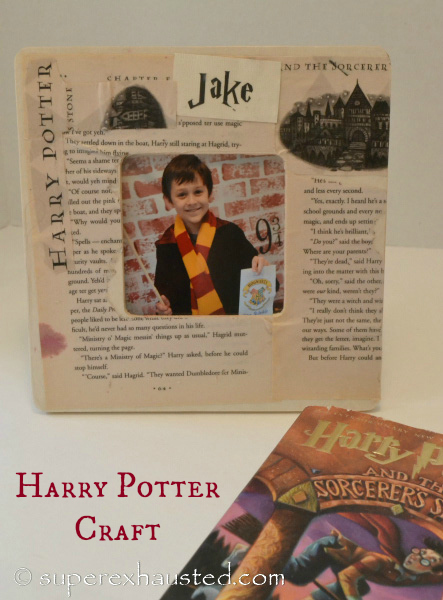
Make a Photo frame from your favorite book and you star as the main character

Sharpie Tie Dyed Tree T Shirt

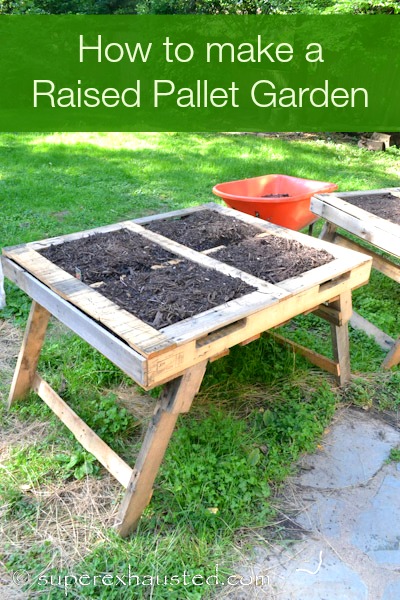
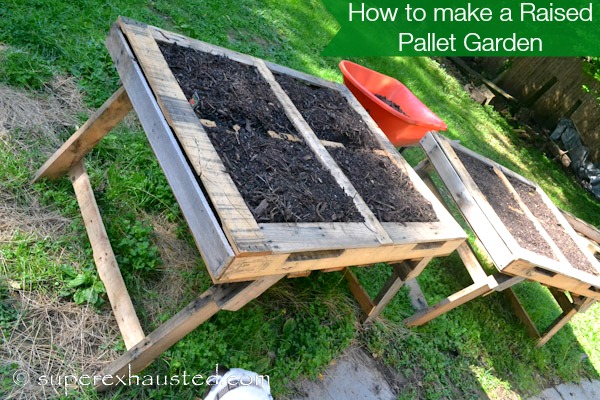
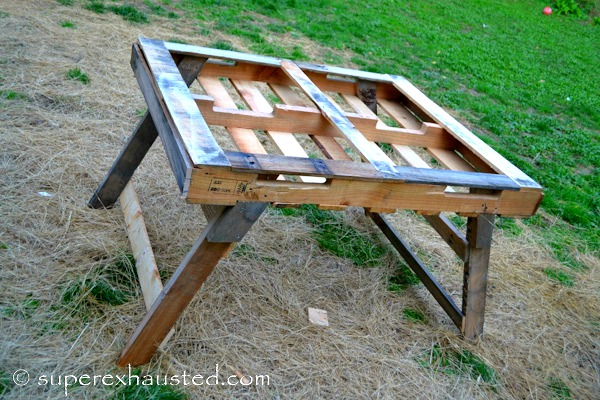
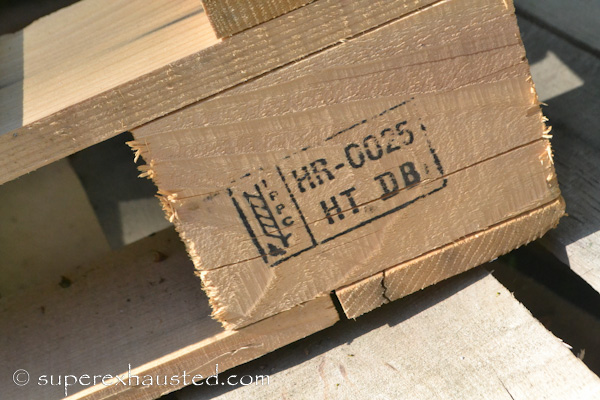
How to make a Raised Pallet Garden

10 Easy American Girl Crafts

Linking to SitsGirls Craft link Up


How to Make a Raised Pallet Garden Beds

raised pallet gardeningRaised Garden Beds &  pallet gardening ideas:  My daughter is in to gardening.  I am well less thrilled with sitting on the ground digging in the dirt.  So My husband and I were thinking of how we can garden without being subject to sitting on the ground.  I posed raised pallet bed we once saw Micheal Simon did on the  Chew.  But Simon’s beds were on saw horses, because this was for my daughter we wanted something more stable with a easy access planting area.  These beds are ADA accessible and great for a older gardener.  The bed is mainly free,  because pallets are free, so minimal cost. Just a lot of work removing nails.ada gardening bed

How to find Pallets:

  • Craigs List
  • Freecycle
  • Home Improvement stores
  • Garden stores
  • Manufacturing Businesses

What should I look for in a Good Pallet:

  • Clean wood
  • New looking wood a natural color
  • They come in various sizes some super sized pallets are great for longer strips of wood
  • Heat Treated wood (not chemical,) Pallets are made from the best quality wood,  so they have knots in wood.  They are not treated to last over time but be sure they are Heat Treated which is brought up to a high temperature to kill insects and bacteria..  The pallet will say  “HT”  and have a stamp on it  like this:pallet HT logo

How to make a Raised Garden Bed from Pallets:

What will you need :

  • 3 Pallets
  • Nails
  • Screws
  • Landscape Fabric
  • soil
  • seed

Tools you will need to make a Raised Pallet Bed:

  • Saw
  • Miter Saw or Miter saw box
  • Sander or Sandpaper
  • Hammer
  • Nail Remover
  • Ruler/tape Measure
  • Pry Bars

Here is the video of How to make a Raised Pallet Bed:

After the Garden is built line with Landscape Fabric fill with compost and organic soil.  Plant seeds.

What to plant in a pallet garden:

I did some research online and Mavis at Onehundreddollarsamonth Pallet Garden Post recommended her best crop was strawberries and butter lettuce were her best crops in the pallets last season,  So I went with her lead.  Strawberries take 2 season so I told my daughter, to not expect great results.

We already have the small start of the lettuce after a few days.


Raised Garden

Follow my Pinterest Board for more Gardening IdeasFollow Sherry’s board Garden grow on Pinterest.

Harry Potter Party Favors: Nimbus 3000

treat brooms Harry Potter Party Favors:  Throwing the Harry Potter party for my daughter.  I was looking for some fun ideas for favors.  This is was not my idea the credit goes to but Jennifer at Ivillage  I really thought it was fun so every kid had a broom when they left and it is an affordable party favor.   I found that I needed a little more instructions on how to actually make the brooms so I documented me making them so you will have a better understanding also I change her idea slightly and added a nimbus 3000 look to the brooms.

What do you need to make a  easy Pop Corn Broom:

DIY Harry Potter Favors  Pop Corn Brooms

  • 1 bag of paper lunch bags
  • clear sandwich bags the ones without ziplocks if possible (so they are more pliable
  • 1 bag of pretzel rods
  • tape
  • black washi tape or electrical tape
  • 1/8 “Gold ribbon 2rolls
  • 2 stock pots of popcorn, NOT buttered

Make popcorn, do not butter, allow to cool and fill plastic bags = if hot or buttered will get nasty in bags

Take both paper bag and cut 2″” off top

Take on one the bags (inner one)  and slice 2″ down from the top in the

Take the other bag (outer bag) pull out the bottom   so it forms a triangle shape (as shown below)

Then cut the outer bag slice to 1/2″ of the bottom seam as shown

harry_potter_craft_013_001-1-2

Place inner bag inside outerbagharry_potter_craft_013_001-2-3

Fill paperbag with the popcorn or your choice of treatharry_potter_craft_013_001-3-2

Add the pretzel rod as a broom handleharry_potter_craft_013_001-4-2

Turn upside down and gather the broom head up popcorn broomharry_potter_craft_013_001-6-2  Tape the broomharry_potter_craft_013_001-7-2

Add the black Washi or electrical tape over the clear tapeharry_potter_craft_013_001-8-2

Glue the gold detail .. and adjust the broom handle and you are done. harry_potter_craft_013_001-9-2

I then placed them in a vintage suitcase.

pop corn broom bags

This project cost under $10 for 15 bags.. the hardest part was making sure I had 15 unbroken pretzel rods

Check out some of my other Harry Potter Theme Posts :

How to make a Harry Potter  9 3/4 backdrop with free pdf

Harry Potter Craft Picture Frame

Harry Potter Valentines or  Thank You Notes

Easy Easter Treats: Chocolate Birds Nest

chocolate birds nestEasy Easter Treats:  Birds Nest I decided to make these treat for the kids for Easter.  These are a chow main treat done loose and deconstructed.  I choose to do them more deconstructed.  Traditionally there chow main noodles are tossed in melted butterscotch chips.  I like chocolate so I make a loose nest.  My daughter helped to make these Easy Easter Treats nests.  I am not sure if they will last it to Easter.  They  are so easy I made batch in about 20 minutes.

Easy Easter Treats: Birds Nests

Makes 15 treatschow main,chocolate,cadbury eggs

Ingredients:

  • 1 bag of Chow main noodles Found in Asian section of grocery store
  • 1 bag of milk chocolate candy melting chips or 2 bags of milk chocolate chips
  • 1 bag of mini eggs  chocolate they look like robins eggs

Tools:

  • wax paper
  • 2 cookie sheets
  • Glass Pyrex measuring cup
  • pot
  • water
  1. Melt 1/2 of the bag chocolate I use a Pyrex 2 cup measuring cup, in a pot of water 1″ of water in a pot (double boiler method) or microwave chocolate in Pyrex cub starting at 30 seconds then 5 second intervalsdoubl boiler method chocolate
  2. Using a spoon drop a quarter size drop of melted chocolate on wax paperdroping chocolate on wax paper
  3. Place chow main noodles on chocolate,  pat down slightlychw main on chocolate
  4. Place a smaller dot of chocolate on top to hold eggs
  5. Place 3 mini eggs on topeggs on chocolate
  6. Repeat till tray is filled and place in refrigerator till chocolate  is hard.chocolate birds nests

This is a great Easter treat to make with the kids,  add peeps to the plate and the peeps now have a place to lay there eggs.girl helping make treat

My daughter age 9 loved make these Easy Easter Treats.  If you child is younger just have them place the eggs since the chocolate is hot.

Happy Easter!chocolate birds nest

disclosure affiliate

Little Passports

Harry Potter Theme Birthday Party Back drop with PDF

Harry Potter Theme Birthday Party Backdrop : My daughters birthday this year was a Potter Theme Party.  So the party I made a Platform  9 3/4 as a back drop.   The kids loved it.  I kept the kids on one side of the house for the beginning of the party. They were only allowed to pass through the platform only after they shopped for there Hogwarts school supplies, in Diagon Alley  and got there school photo taken.   The Platform was so easy to make,  took about an 1 hour.  I have included the PDF for the Platform_9_3/4 so you can iron it on.  I got the sheet at a thrift store.girl dress as harry potter

Harry Potter Theme Birthday Party Backdrop

  • 1 King or queen Sheet  or cotton shower curtain
  • 1 sponge mop head  or large sponge
  • 6 bottles of brick acrylic paint found at craft store
  • a Styrofoam plate for paint
  • 1 sheet of printable iron on transfer
  • Optional: Grommets to hang the sheet up with
  • Scissorssheet and sponges
  1. Outside on a flat surface lay out sheet Driveway works great
  2. Squeeze paint on plate- (you can water the paint down if you want to stretch it more)
  3. Dip mop head (I like the shape looks like a Brick) and stagger brick pattern letting the white of the sheet be the mortarBrick pattern
  4. Cover entire sheet…You will have to walk on sheet to do this.. it is ok if it get s a dirt it will blend.   Allow the paint to be spotty on the sponge looks more like bricks.
  5. Allow to dry9 3/4 platform
  6. Then fold in 1/2 and cut on the fold 3/4 up the sheet for the opening  (do not cut total across)
  7. You and sew the edge if you want to avoid the fray but mine did not fray because of the paint and we kept it up for 2 days.
  8. Next add the Platform_9_3/4;  Use the the 9 3/4 PDF  place the transfer paper in your printer and print.  The follow iron transfer instruction  and put the 9 3/4 on your Brick wall
  9. Placement of the 9 3/4 depends where you want it.  Mine was a little low on the wall but I wanted it in the Kids Pictures so I measured my daughters height and ironed it there, ( but my sheet was really long so I had some dragging on the floor,  so that is why it was about a foot lower than I wanted)  So dbl check before you iron.harry potter backdrop with girl
  10. Now you are ready to hang- You can add grommets to the top of your sheet and hang on nails,  or use a Shower curtain (This method Plan the layout of the center opening accordingly)kid passing throung 9 3/4 platform
  11. Add some old suit case (thrift stores or Craig list) and you are ready to add the World of Harry Potter.platform 9 3/4

The Harry Potter theme Birthday Party this was the  Platform 9 3/4 perfect back drop.   It was great for the kids Hogwartz class pictures.  Which the kids made frames as a craft  to see the see my post here.  Harry Potter Theme Crafts Frames  I also will be writing post for the full party, food, games, and more so check back.harry potter framesThis post may contain affiliate links

Little Passports

Harry Potter Theme: Craft

Harry Potter Theme : Craft Ideas for a Harry Potter Party.  This  year we had a Harry Potter Theme Party for my daughter birthday.   She is obsessed with the World of Harry Potter,  so having was perfect craft for her 9th birthday.  We did alot the day of the party so to occupy the 11 kids we made a Harry Potter Craft,  a Picture frame,  using pages of the actually from a Harry Potter book, scrapbook paper, and mod podge.  My husband also downloaded a harry potter font from the internet,  we printed it on off white parchement paper.

harry_potter_craft_013_001-16a

Harry Potter Theme Craft  Picture Frame:

  • Frames: located wide frames at Micheal’s Crafts $1.00- Ac Moore has them but not as wide
  • Mod Podge: 1-2 bottles 6.99 AcMoore
  • Foam sponges: $4.99 24 pack
  • Harry Potter Book- found at used book store
  • Assorted scrapbook paper- 4 sheets
  • 1-2 sheets of off white or parchment paper 81/2″ x 11″ for printer

    supplies to make

Towards the begin of the party I had all the children take there Hogwartz School Id in front of Platform 9 3/4 –  see my separate blog post on wow to make Harry Potter Backdrop: Platform 9 3/4.   So every one had a picture for the frame.

I had all the frames set up for the kids will pages of the book on the table.  The instructions I gave was you can rip the pages to make a collage. I have them several dishes of modge pod ad every one had their own sponge brush.

  1. You have to wet the frame with the mod podge then apply the pages,  and be sure to layer the mod podge   between.  Rip the paper for a collage effectapply paper to frame
  2. Dont forget to have the kids add there name in a Harry Potter Font  you can down load the Harry Potter font here for personal use.
  3. Allow it to dry for 20-40 minutes
  4. When dry cut out overhang on inside of frame and outsidecutting of over hang
  5. Sand edges with sand paper,  this will give the frame rounded edges and alow it more finished,  the apply one more layer of Modpodge
  6. Insert picture and enjoy.

The kids love this Harry Potter Theme craft.  It also made a great party Favor for the Harry Potter Party.  It is also a great frame for those harry potter pictures.harry potter craft frame

I will be posting the entire party on my blog so be sure to check back to see the other fun parties we had.

The kids that did not read the books said I think I want to read them and learn to love the World of Harry Potter.Harry Picture frame


Cheap Solution for a Muddy Backyard

muddy backyardCheap Solution for a Muddy Backyard:  My dogs track in mud from  my backyard every spring.  During the winter the dogs barely step off the patio in the cold to do their business.  So my grass well is no more by the end of the winter.  So once the thaw happens, my back yard turns into a muddy mess. My daughters birthday is in March and it is usually the 1st really nice day.  Which means I have 15 kids running in and out of my home in the mud.   So several years ago we decided we needed a solution for our muddy backyard.muddy backyard

Cheap Solution for a Muddy Backyard:

Straw/ Hay

We purchase Straw or hay depending on the garden centers recommendation.

  • Straw has seeds so wit will make weeds in your lawn-  For us we have not been able to get grass (because of the dog urine) to grow in that area beside the weeds in the straw.. so it is ok for us.  Straw is the cheaper solution about $13 bale
  • Salt Hay does not have seeds  so it will not make weeks in your yard.  Salt hay cost about $17 a bale

What I love about this Cheap Solution for a Muddy Backyard is the straw/hay actually will decompose as the spring and summer come so by early summer it the mud and hay are all gone.

1 Bale of straw / hay did a large area  I used the entire bale

No more muddy shoes or paw prints in your home .. your welcome. muddy backyard

10 Birthday Surprise ideas for Kids

Unique kids birthday surprise ideas: 10 Great Ways to surprise your child on their birthday and creating a birthday tradition.  Every year since my son has been in school on his birthday I have shown up at school with balloons one for each of year. boy and balloons This year since he is in 7th grade I did  not go to the school with the balloons… (I don’t want to be uncool parent) So instead  the dog and I pick him up at the bus, fully loaded with 13 red balloons.  He still smiles and is happy on his birthday because, it is his special day.  I see me sending balloons to his office when he is 30.. it makes me giggle at the thought.  So for me the balloons have become a birthday tradition in our house.  My kids have come to expect their surprise of balloons and mom making a fool of herself.   As my son gets older I am looking for  new ideas to celebrate his teenage years that are  affordable birthday surprises. Here are some other ways to make you child feel special on there big day!

10 Birthday Surprise ideas for Kids


    1. Balloon at school pick up:  if you wear a costume it makes it extra silly (I wear a superhero cape every year from BabyPop my  superhero cape  store)
    2. Flowers: My daughter has been getting flowers since she has entered kindergarten.  I asked her if she wanted Flower or Balloons a few months before her 6th birthday.  She said flowers.
    3. Decorate house overnight: My friend Hillary does the decorating of the house while her kids are asleep. When they get up the morning of their birthday it is the land of streamers.
    4. Birthday Food: make a favorite meal or breakfast.. When I was a kid one day a year my mom would buy Cookie Crisps cereal .. our birthday cereal and we would also get  our favorite dinner
    5. Birthday Plate: make one at a local ceramics shop like at Color Me Mine  or Hallmark makes one if you can find it
    6. Birthday balloon avalanche from My Dream Sample box
    7. Birthday balloon box form DIYSTUDIO.com
    8. Power of Silly String: This year I attacked him with silly string while he played his new video game.. I also bought 2 other cans so the kids could have a silly string fight in the backyard.. my son said he loved it. My daughter then requested it for her birthday. I loved this idea for Teen birthday surprises. I might have to wake him up with silly string.
    9. Confetti: never underestimate a good mess
    10. Trick Candles or Sparkler candles:  I know this is old school but kids love the ideagirl with flower

What special things do you do for your kids birthday?

boy and balloonsDisclosure : this post contain affiliate links

Little Passports

Harry Potter Printable Cards for Valentines

Harry Potter Printable CardsHarry Potter Printable Cards for Valentines : My 8 year old daughter is obsessed with Harry Potter.  The books the movies.  She even dresses in a grey skirt, tie and white shirt for school, and she does not wear a uniform. I Know right.  So this year I decided to have my artist husband make up Harry Potter Printable Cards for Valentines.

They don’t say be my valentine so these are great any time of the year.. Think on a Birthday Gift or the candy cards as a Harry Potter party favor.harry potter party favors

I had him make up 2 different valentines day cards.  One that is just a card, 4 Harry Potter Card to a sheet  and one with 4 candy card headers to a sheet.  Because I am all about the options.harry Potter printable valentine

To make Harry Potter Printable Valentines Cards:

  • To print the PDF you will need 8 1/2x 11 card stock.
  • Stapler
  • I purchased the Bags at AC Moore or you can find here
  • The Frogs  I had to look around for them, I purchased some at a froyo place.   I suggest buying in bulk  12 to 1lb here  Big Green Gummy Frogs 

Other Candy Suggestions: Jelly Beans (aka Bott’s beans) , Gummy Spiders,supplies to make harry potter cards

Free Printable

Harry_Potter Printable_Valentines_Card  PDF


Harry_Potter Candy_Card_Printable PDF

Have your kids dress up as Harry on Valentines Day to hand these out and it will be super cute.Harry Potter Printable Cards and Favor Bags

Please note these cards are not for resale  the images  belongs to superexhausted.com

Be sure to check out all my Harry Potter Posts for throwing a great Hogwarts Party

Happy Valentines Day


Bug Birthday Party Idea: How to make Bug Soap

bug soapBug Birthday Party Idea : How to make Prehistoric Bug Soap.  I made this bug soap for my sons Bug birthday party a few years ago.    We had the party at a bug museum and rather then just giving all the kids plastic bugs I decided bugs in case in “Amber” would be fun and also useful.    This is also a great idea for  a Dinosaur Birthday Party  This is also a fun craft if you used any plastic toy,  butterflies, dinosaurs  or dragons.  The possibility is endless. Disclosure: This Post Contain affiliate Links

I kept on thinking of Jurassic park of the bug encased in amber at the end of the scientist/rich guys cane.

How to Make Bug Soap:

10lb of Glycerin melt and Pour Soap (makes 36 bars ) You can find at Walmart, or Craft store look for a coupon and save

Bag of bugs (I found them at dollar store or party store)  Watch size so they fit in molds

Soap Mold dome (purchase 2 if you can make the process go faster)

  1. Take soap out of tubglycerin soap
  2. Cut glycerin soap into  3/4 slices,  then into 3/4 ” cubes  so squares keeping the size consistent allow for them to melt easier
  3. Place in a measuring cup
  4. Melt in microwave using 15-30 seconds intervals.. stirring in between  it will bubble
  5. Caution it is very hot
  6. Now add yellow coloring,  I used yellow food dye and you can also add a fragrance (because of kids I avoided the fragrance.adding color to soap
  7. Carefully pour  the soap in to the soap molds,  fill only 1/4 of the way to the top of mold-  this so the bug is suspended in the soap
  8. Allow the partially filled mold  to cool 1 hour  (do not place in fridge because it weakens the mold
  9. Add Bugsadding bugs to soap mold
  10. Reheat soap see step above and cover the bugs with soapcovering bugs with soap
  11. Allow to cool 1-2 hours  till soap is completely hard
  12. Then flip out allow any additional drying time if needed.
  13. Package in plastic wrap or clear bags used for candy found at craft store

Tip: If you have bubbles after stirring and soap is in molds?  spray some rubbing alcohol  on the soap to removed the bubbles on the top soap.

These Bug Soap make great favors for  a Bug Birthday Party, or Dino Birthday Party. Bug Soap

Follow me on Sherry Aikens Pinterest for More great Craft ideas.
This Post may contain affiliate links
Little Passports