Tag Archives: diy

How to make a iphone neck holder

ipod neck holder

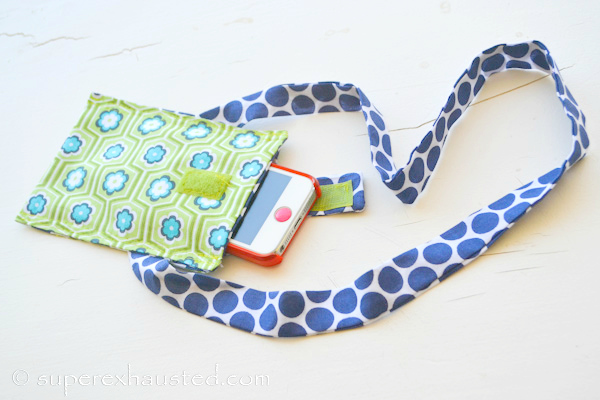
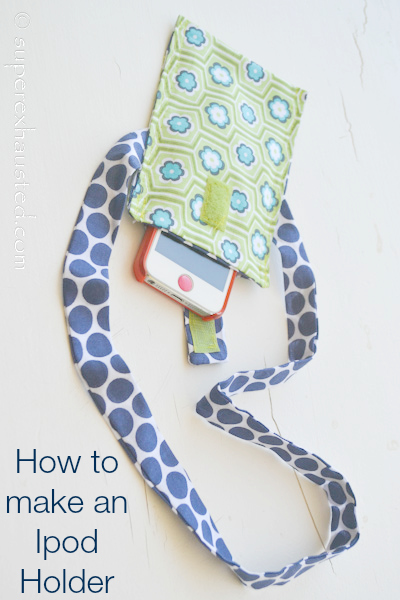
How to make a iphone neck holder : So I like to work hand free while listen or talking on my cell phone.  So a few years back I made a phone case neck holder that allows me to talk or listen to my cell phone hands free.   Decided to share the pattern and how to make one with you.

How to make a Ipod neck holder

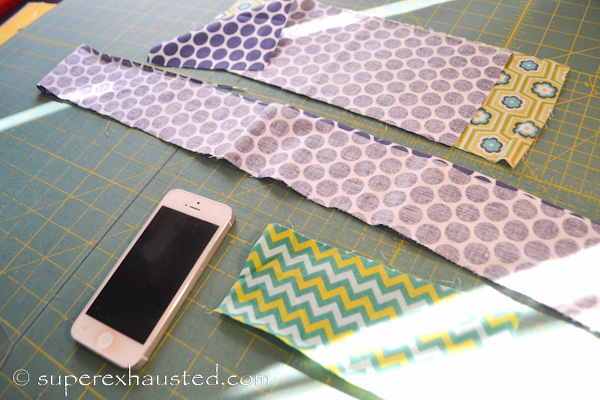
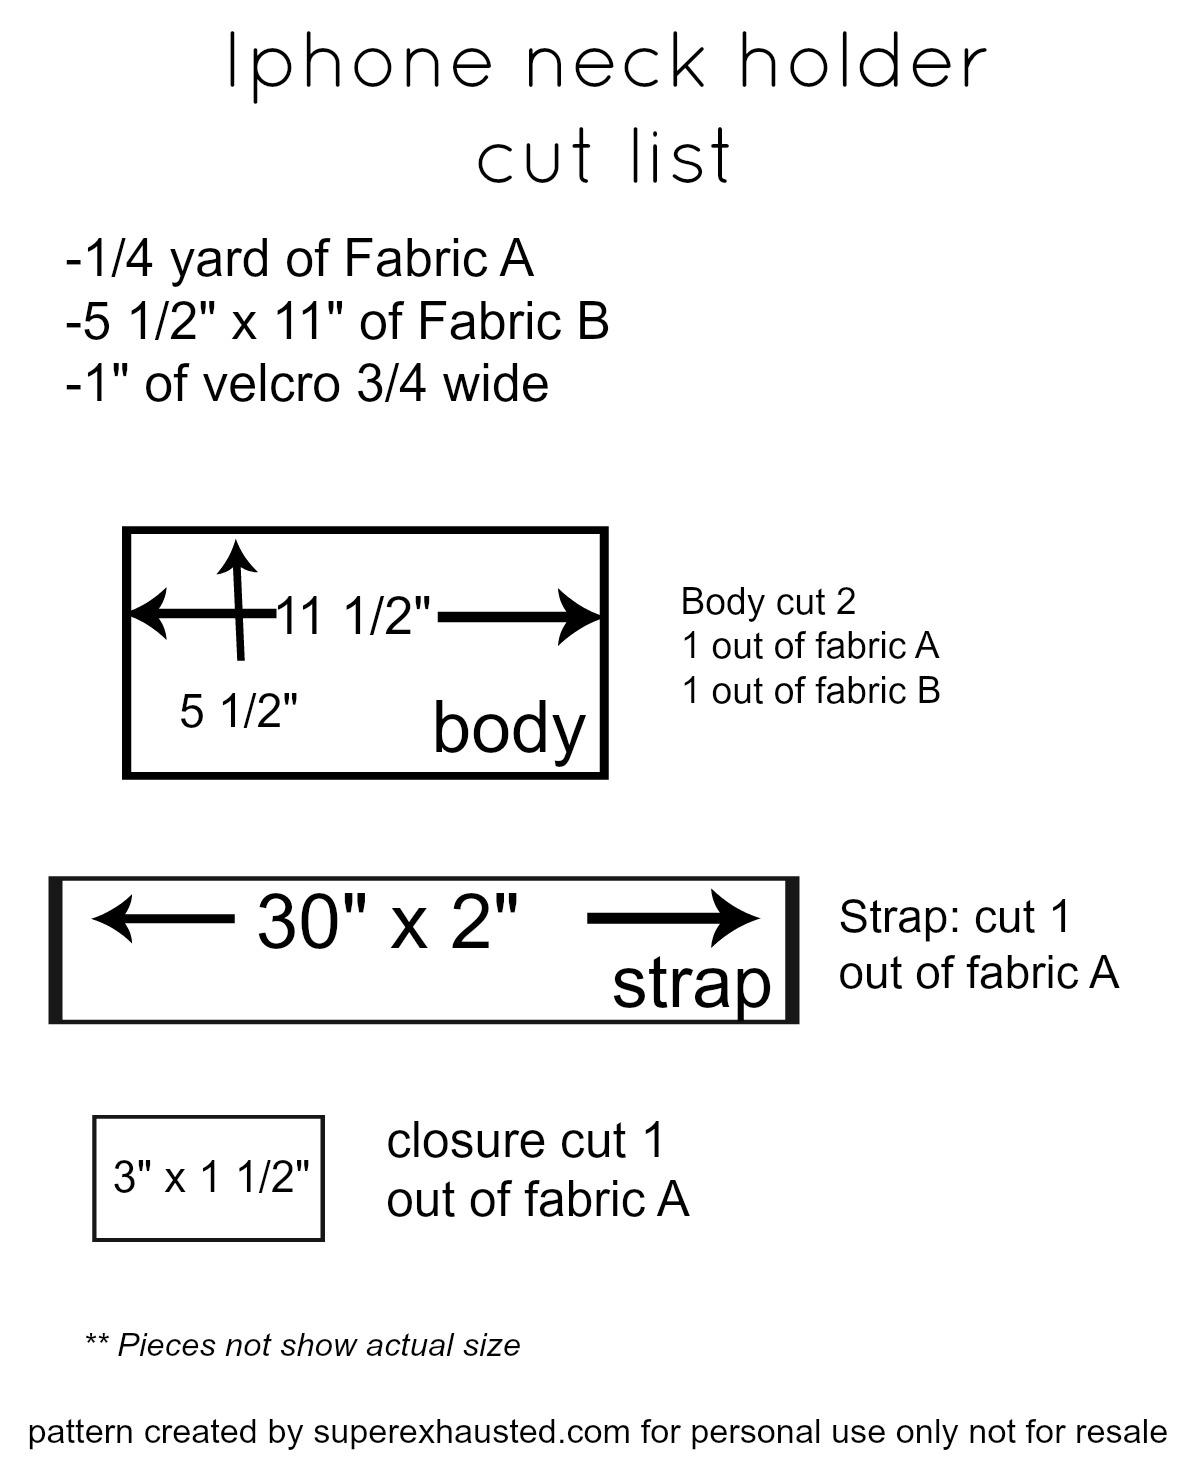
  • Strap 2″x30″ fabric A cut 1
  • Body 5″x10″ Fabric A  cut 1 and Fabric B cut 2
  • Closure 2″x 5″ Fabric B cut 1
  • 1 ” Velcro

Print out of cut parts at bottom of post
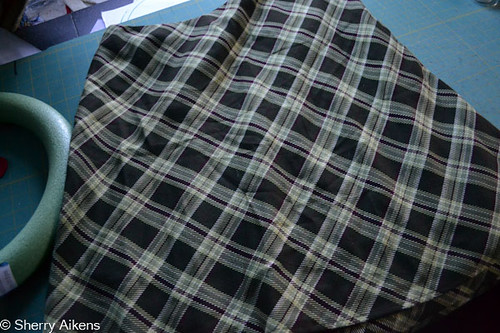
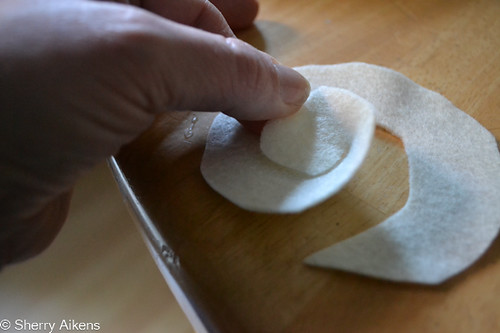
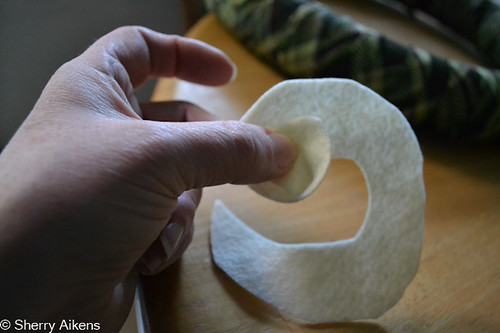
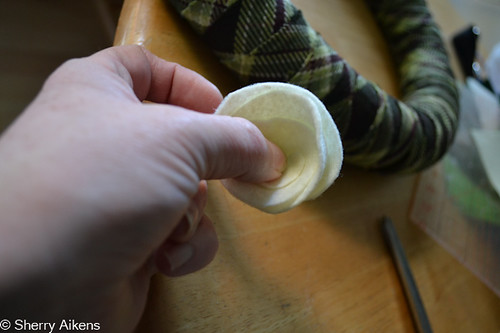
  1. Cut piecesiphone neck holder
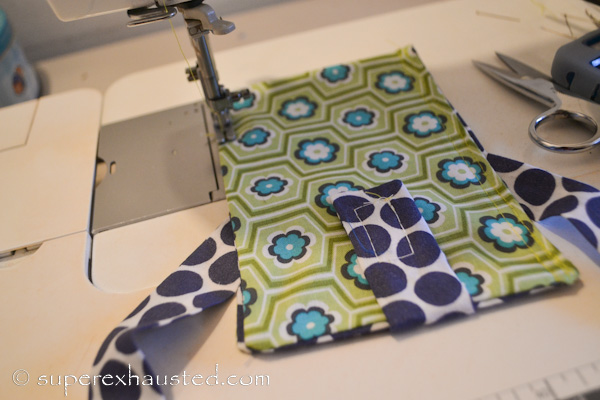
  2. Take closure strap, fold long ways and sew as shown
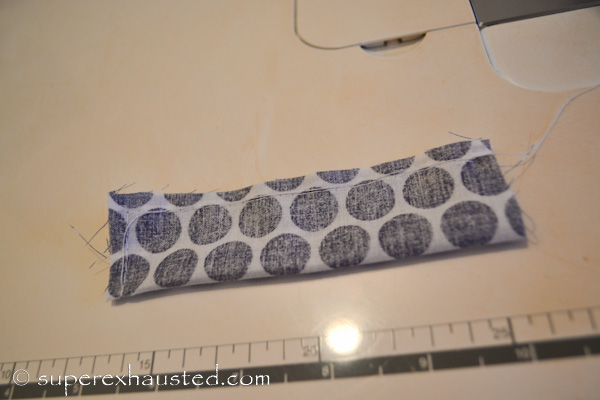
iphone neck holder iphone neck holder
  3. Turn and press
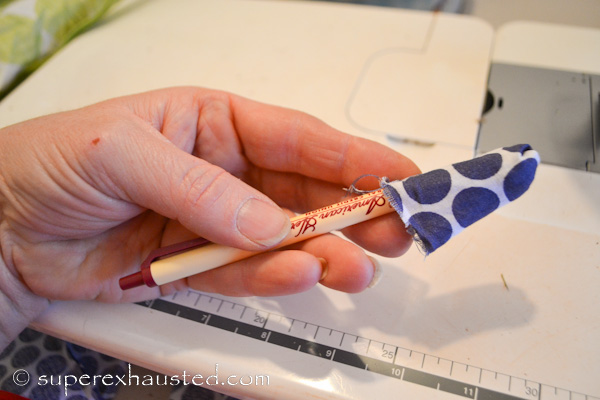
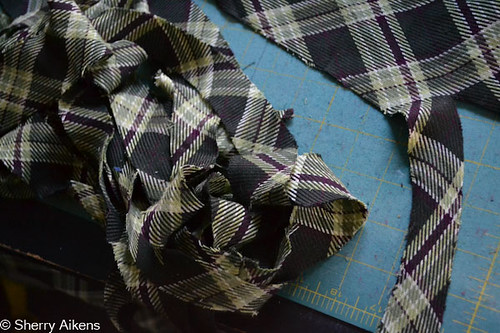
  4. Take strap, fold, sew and turn if you attach a ribbon to one end , sew inside tube and pull makes turning a small strap much easier, cut ribbon off once the strapped was turned. iphone neck holderiphone neck holder
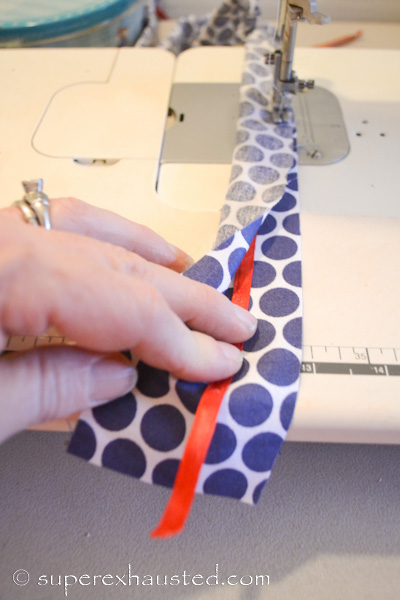
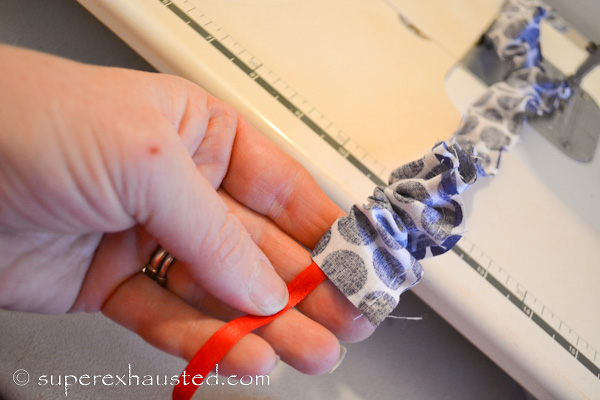
  5. Press strap, set to side
  6. Take body placing wrong side together, place in closure strap at short end sandwiched between the layers.iphone neck holder
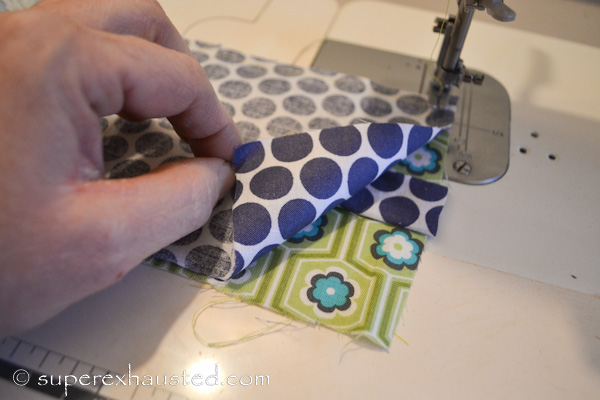
  7. Sew around the edged leaving and opening to turn the bodyipod_neck_holder_1_013_0011-11
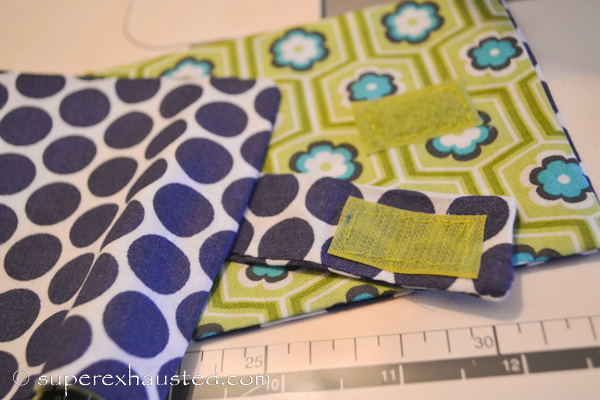
  8. Clip corners, turn body and press
  9. Add Velcro on strap and body so they match upiphone neck holder
  10. Fold and place neck strap at an angle between the body layers and sewiphone neck holder

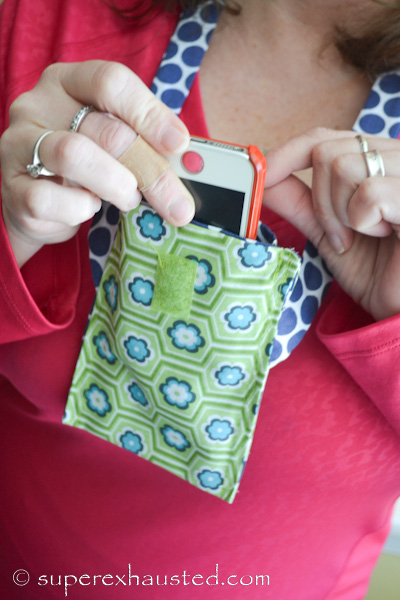
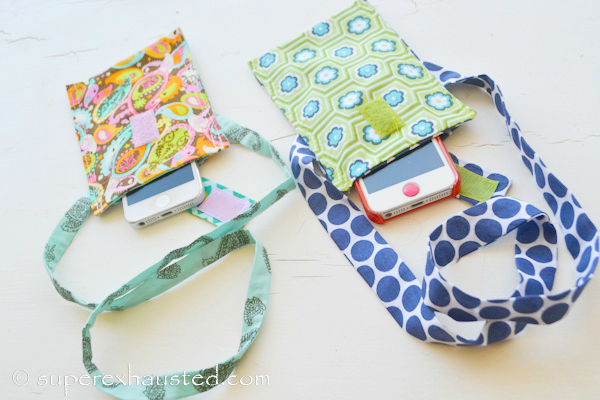
The Neck holder is great for hands free talking on the phone ass Headphones and do dishes while you listen to your music.

ipod_neck_holder_1_013_0011-3-3ipod neck holderipod neck holder

ipod holder

Enjoy


Cheap Solution for a Muddy Backyard

muddy backyardCheap Solution for a Muddy Backyard:  My dogs track in mud from  my backyard every spring.  During the winter the dogs barely step off the patio in the cold to do their business.  So my grass well is no more by the end of the winter.  So once the thaw happens, my back yard turns into a muddy mess. My daughters birthday is in March and it is usually the 1st really nice day.  Which means I have 15 kids running in and out of my home in the mud.   So several years ago we decided we needed a solution for our muddy backyard.muddy backyard

Cheap Solution for a Muddy Backyard:

Straw/ Hay

We purchase Straw or hay depending on the garden centers recommendation.

  • Straw has seeds so wit will make weeds in your lawn-  For us we have not been able to get grass (because of the dog urine) to grow in that area beside the weeds in the straw.. so it is ok for us.  Straw is the cheaper solution about $13 bale
  • Salt Hay does not have seeds  so it will not make weeks in your yard.  Salt hay cost about $17 a bale

What I love about this Cheap Solution for a Muddy Backyard is the straw/hay actually will decompose as the spring and summer come so by early summer it the mud and hay are all gone.

1 Bale of straw / hay did a large area  I used the entire bale

No more muddy shoes or paw prints in your home .. your welcome. muddy backyard

Harry Potter Printable Cards for Valentines

Harry Potter Printable CardsHarry Potter Printable Cards for Valentines : My 8 year old daughter is obsessed with Harry Potter.  The books the movies.  She even dresses in a grey skirt, tie and white shirt for school, and she does not wear a uniform. I Know right.  So this year I decided to have my artist husband make up Harry Potter Printable Cards for Valentines.

They don’t say be my valentine so these are great any time of the year.. Think on a Birthday Gift or the candy cards as a Harry Potter party favor.harry potter party favors

I had him make up 2 different valentines day cards.  One that is just a card, 4 Harry Potter Card to a sheet  and one with 4 candy card headers to a sheet.  Because I am all about the options.harry Potter printable valentine

To make Harry Potter Printable Valentines Cards:

  • To print the PDF you will need 8 1/2x 11 card stock.
  • Stapler
  • I purchased the Bags at AC Moore or you can find here
  • The Frogs  I had to look around for them, I purchased some at a froyo place.   I suggest buying in bulk  12 to 1lb here  Big Green Gummy Frogs 

Other Candy Suggestions: Jelly Beans (aka Bott’s beans) , Gummy Spiders,supplies to make harry potter cards

Free Printable

Harry_Potter Printable_Valentines_Card  PDF


Harry_Potter Candy_Card_Printable PDF

Have your kids dress up as Harry on Valentines Day to hand these out and it will be super cute.Harry Potter Printable Cards and Favor Bags

Please note these cards are not for resale  the images  belongs to superexhausted.com

Be sure to check out all my Harry Potter Posts for throwing a great Hogwarts Party

Happy Valentines Day


How To Make Natural Bug Repellent

natural bug sprayHow to make your Natural Bug Repellent So I have been researching natural ways to  avoid mosquitoes and flies from biting my family.  How to make your own  bug repellent ? So during my research I learned flies / mosquitoes hate basil and lavender.  I did more research and learned that witch hazel reduces itching.  So I decided to combined some ingredients and see what will work to deter the pests.

girl picking lavenderI went to a local lavender farm Peace Valley Lavender Farm  in DoyelsTwon PA.  I was talking to the owner and he said you know we never really have a bug issue except for the bees which pollinate our plants.   While at the farm I purchased Lavender oil.  Then I purchased sweet basil oils from a holistic healing shop that carried essential oils.   You can also purchase the essential oil online as well or whole foods.
Basil oil has an anise smell,  which is strong at first then you smell the under tones of lavender in the spray.
Witch Hazel is a anti-inflammatory and helps to reduce itching,  it also helps with pre-existing bites and sunburn to cool the burn.

This spray works great for my family. I like the idea of making a non toxic Natural Bug Repellent

Natural Bug Repellent

Ingredients:

  • 2 cups Witch hazel,
  • 2 tbl spoons 95% alcohol,
  • 20 -30 drops Lavender oil,
  • 20-30 drops Basil Oil
  • Spray bottle- which I found at Dollar Treenatural bug spray

Mix the ingredients in a spray bottle.
I have attached a PDF for the Labels please print labels on a 8.5 x11  Natural Bug Spray Labels You can print the labels and attach with Modpodge, print on a self-adhesive label, or clear packing tape.

  • This product has been tested on my family and friends.  It does work fantastic for us.  But please use at your own risk.
  • Please note .. dbl check person you are spraying is not allergic to the ingredients.
  • Avoid spraying In eyes
  • Do not drink

I also wanted to let you know if planted  Basil and Lavender around a perimeter  of a home has the same replellant affect.  Lavender does attract bees the month they bloom (late June-Aug).   Any variety of either plant Basil or lavender will repel  so  add them to picnic table décor  to keep the pest away from food.basil and lavender plants

Disclosure:  This product has been tested on my family and friends.  It does work for us.  But please use at your own risk.

 Check out My other Popular Posts :

Repaint a Swing Set

How to Fix Fitted sheets to stay in place DIY

DYI Raised Pallet Garden

Beach Memory Jars

Roasted Cauliflower a new twist on a favorite

This post may contain affiliate links
Little Passports

How to Make Mozzarella and Weekly meal Planning


How to make Homemade MozzarellaHow to Make Mozzarella . I love cheese.  I would eat it on everything is possible. So I decided to learn how to make cheese. I goggled how to make it and came across many sites.  My favorite was New England Cheese Making Company. It is a small company that prides themselves on the art of cheese making.  The New England cheese making company was nice enough to send me a cheese making kit to review to try making my own cheese.

The kit is great 30 Minute Mozzarella and Ricotta Kit arrived and I was so excited to try.  I used a gallon of whole milk. and tools provided in the kit.   I made the cheese on vacation don the shore  and it was super easy.  The kit contained everything I needed to make cheese except for milk, water and pots.   The kit contained Dairy Thermometer (E3), 1yd re-useable Butter Muslin, Citric Acid (C13), Vegetable Rennet Tablets (R4), Cheese Salt (S1) and Recipe Booklet.  The instruction book was very well done and easy to follow.  Below is a glimpse of my experience. I do recommend buying the kit to start and check in out the New England Cheese making site  Cheesemaking.com  for full details and the science on the art of cheese making. cheese making kit It was great seeing the curd separate fro the whey, it looks like custard. curds and wheyI thought when I drained off the whey the curds were not done but I continued.  Turned out not to be a problem. cheese making curdsThen you have to dip the Curd in hot water 185 degrees then pull the curd while hot to make the long stringy fiber and add salt while doing so this is the part I opted to do smaller batches,   because it was hot hot.. I have no pictures of this step because no one was there to take pictures (my husband slept on the couch it was late) .  Rickis the NewEngland companies owner  instructions cover the cheese pulling this step, very throughtly. making cheese

It took me about an hour because the pot of water did not heat up quickly and I made 2 small batches since I was worried I could not make it all at the same time. How to Make Mozzarella. Also  I did not add salt to the 1st batch and it needed it.  The 2nd batch  was supper yummy,   Such a fun treat to have with your summer tomatoes.

I can really recommend the New England cheese making kit.  It has everything you need and great instruction how to make cheese.  The Basic Cheese  kit I use cost $24.95 and it makes up to 30 lb of cheese.  The tablets keep forever if stored in the freezer. cheeseHave you every tried making your own cheese?  How did it turn out?

Weekly Meal Plan :

Monday Chicken BBQ with salted potatoes

Tues: Mozzarella pizza with fresh basil and tomatoes

Wednesday: Spaghetti  and sausage

Thursday:  4th of July picnic

Friday Making cookies and pickles for weekend picnic so fend for yourself night.

I am linking up to Organizing Junkie Menu Planning Monday

mpm chalkboard


How to Repaint a Front Door

Front door

How to Paint a Front door.  So I decided I need a fun spring make over to my Front door.  I wanted a Pop of color for spring an liven up my front door.   So off to th store to buy paint an spray paint.  I decided to paint the benches and add flowers.  I love color it can total change your mood.

How to Paint a Front Door

Before I had a boring entrance. front door

Tools:

  • Drop cloth
  • Exterior Paint A pint was enough to do the door
  • Small roller
  • Paint brushes
  • Painters Tap
  • If doing benches (3 -4 cans of spray paint)

The project total took about 3 hours with benches:

  1. Wash front door with Fantastic or a cleaner and paper towels to remove and oil and dirt from every day use and allow to dry.
  2. I started with the front door since It need to be closed at some point.  I taped newspaper/or a drop cloth to the floor in side
  3. Removed the door handle and lock I taped the window and Mail slot since they could not be removed.
  4. You could take the door off the hinges,  I was not planning to do both sides I decided to leave it up.
  5. I did 2-3 coats allow to dry between.Door

How to Repainting Outside Chairs and Benches

While I was wait for the front door to dry i painted my Chair and benches.  if you don’t have benches be sure to Check out thrift stores.  Or you might see one someone has toss to the curb.

Be sure to use a stiff wire brush to loose any metal.

Then tape off the area you don’t want painted and spray.  I also moved to a side part of my law where the over spray does not get on the house.

Here is a Step By Step:repainting a benchThen I did the chair which took less than 10 minutes:

outside chair So that is my Spring makeover to my front entrance.  I love the pop of color.  I added a new door mat and flowers.  A wreath is a pop of color.  This door I know looks bright.  I did this project last year and I have lived with it for over a year.  I have to say I still love my door.  I always can tell people which house is mine.  The door goes well all year long.  In the summer a bright sunflower Wreath,  Fall : orange flowers looks great and in winter Reed and white or a Pin wreath pops.  bench bench

What project do you have lined up for spring?


American Girl Doll Picture Frame

American girl picture frameHow to make an American Girl Doll Picture. This is a great craft idea for an American girl party favor or a girls craft project.  It is a easy project for your daughter to make.  We used the catalog the American Girl Doll catalog for the pictures and verbage.  My daughter love learning how to make this American girl craft.  She help cut out the pictures, and planed out the lay out herself.

Materials For an American Girl Picture Frame:

  • Wooden Frames I got mine from AC Moore for $1 each they also have one with Mirrors so you can do a Mirrior instead of a fame.
  • Mod Podge
  • Brush or foam brush (you can buy in bulk $6-7 for 10 foam brushes)
  • Roller or sponge
  • scissors
  • Pink Spray Paint or Acrlich paint
  • American Girl catalog


how to make a american girl picture frame

Instructions to make an American Girl Doll Picture Frame:

  1. Remove the picture area from wooden frame.
  2. 1 day Prior With adult supervision spray paint or paint  the wooden frames so they have time to dry.  I was doing many frames so spray paint was easier for me.
  3. Cut out pictures from the catalog
  4. Plan out layout of  the American Girl pictures
  5. Apply the Mod Podge where you want the picture to go.
  6. Carefully place down picture the catalog is thin so do not over apply Mod Podge and whee you put it down it stays you can move the pictures.
  7. Be sure to roller or with a sponge careful smooth out the picture removing all air bubbles out from under the pictures.
  8. You can layer the pictures long as you apply the Mod Podge under the image.  It will dry clear
  9. After getting all the images applied coat of Mod Podge  over the entire surface,  to see the frame.
  10. When you are done on any corners where the pictures wrap on the the edges you can use a light sand paper  to smooth out the edge and making a more finished look.

This is a great inexpensive craft for a American Girl Party Favor $2.70 per kid.  With the cost being under $27 for 10 frames  (that is the spray paint $4 Frames $10, brushes $6-7 bulk, and Mod Podge $8.00).

I also think this is fun craft with boys as well get the Lego catalog.

Check out my other post on easy sewing for American Girl Dolls Free patterns.

Also be sure to follow my American Girl Doll Ideas on Pinterest.

I am Linking the Post up to Barbs’ Fabulously Frugal Thursday 

St Patricks Day wreath from a Recycled Skirt

recycled wreathThis is my recycled St. Patrick’s Day wreath made from an old plaid skirt, foam wreath, straight pins and felt.  Super easy to , no sew, and makes a statement for the St. Patrick’s Day.  Show off your Irish:st_patricks_wreath-27-127

How to make a Recycled Wreath

Materials:

  • 1 plaid skirt-  I picked up this one at the thrift store for $1
  • Foam Ring: Ac more $7-8
  • Straight Pins
  • 1 safety pin
  • 1 of each color of  craft felt green, lime, orange,off white (9X12 sheets) $.59 each


To Recycle the skirt: Place the skirt flat on a table cut diangle making a 1 1/2″ strip.  It does not have perfect.

st_patricks_wreath-1-101st_patricks_wreath-2-102

Continue around the skirt making one continuous piece of fabric strips

st_patricks_wreath-3-103

Roll continuous fabric strip in to a rolls so make easier to use, when wrapping wreath .. do not twist

st_patricks_wreath-4-104

Attaching  with pins the end to foam wreath form start wrapping the fabric around the wreath (this is why you need the ball)

st_patricks_wreath-5-105

Over lapping  the wraps to hide the foam shape

st_patricks_wreath-6-106

Cut and Pin end when the entire wreath is covered.

To make felt  flowers:

Take a piece of felt cut 4″4″  square, round off corners

st_patricks_wreath-9-109

The cut a spiral from the other edge moving towards center

st_patricks_wreath-10-110st_patricks_wreath-12-112

Then roll from the center the flower shape,  securing end ,  when pinning to wreath

st_patricks_wreath-13-113st_patricks_wreath-14-114st_patricks_wreath-15-115st_patricks_wreath-15-115

Add as many flowers as you like,  you can make smaller spirals or larger<st_patrick_decor_22013_1-2

Make hanger 2″ x 9″  from felt Strip with notches,  use a safety pin to hang on door.

st_patricks_wreath-25-125

st_patricks_wreath-20-120

Enjoy your Irish decor.  Have fun upcycling that old skirt.  You can make one in anay colors.

Do you decorate your door?

st patricks day wreath

Valentines Keepsake Trunk and AC Moore Giveaway

wooden box covered with paper

Wooden Trunk covered using scrapbook paper and Mod Podge.  This idea was given to me by AC Moore.  The asked me to make a wooden trunk using the directions AC Moore provided.  It has been years since I worked with Mod Podge and AC Moore had everything I need to make the task fun.  I loved the idea of the trunk and the more I read the instructions I could not wait to try it.  The inside had little cards decoupage inside.inside the keepsake trunk

The idea of this craft was from AC Moores designer Robin Beam.. Click here for Robins instructions Valentines Keepsake Trunk.  Note: (the trunk size listed is a M   the patterns and sku is for a small trunk) .  I made the medium size which was larger so I adjust the templates.  Robins Templates where for the small trunk.keepsake box by Robin Beams

Robin @ AC Moore did her trunk with different paper than I did.  I choose 7 sheets of 12×12 scrapbooking paper open stock. (The apparel designers in me loved all the prints). But the instructions are the same.

  • Remove hardwear, I painted the inside and outside corners/edges.
  • I cut the templates, cut the scrapbook paper to size
  • Follow instructions added the mod podge, place paper, and smoothed out all the bubbles.
  • The tip Robin said about sanding the edges,  the excess paper will just sand away.. seriously really rocks takes the trunk from a simple project to a quality piece.  Make sure to remove all the dust from sanding, before applying next coat…..sanding the mod podge box
  • Be sure to read AC Moores full instructions.. Valentines Keepsake Trunk

By the time I finished I coated the Trunk with 5 different coats of Mod Podge .. I really love doing this project.  I loke the medium size box it allows me to put a full 8 1/2″ X 11 Paper in it flat.  My daughter keeps eyeing the box up.picture of a trunk

Ac Moore want you to create so they are providing a 50% coupon for this week to all my readers.   AC Moore Coupon 2/10-2/16

Also Ac Moore  wants one of my readers  to create something so they are Giving away $20 gift certificate to one of my readers.  Ends 2/24. US residents Only  Please use the rafflecopter form.
a Rafflecopter giveaway

Disclosure:  Ac Moore provided a Gift Certificate for me to purchase the supplies.  The opinions in this post are all mine own.

Ideas to Help You Drink More Water

Water as I diet and get healthy, water has been vital to making my weight loss quest successful.  So I have been developing new ways to flavor water. DIY flavor water.  My kids also could not wait to try the DIY flavored water as well.

Here are some homemade flavored water ideas.

  • Melon
  • Strawberries with lemons
  • Mint
  • Cucumbers (try mixing with melon)
  • Apples
  • Peaches
  • Berries
  • Bell of Hot pepper/with red pepper flakes
  • Cinnamon sticks
  • Cilantro or basil with cherry tomatoes
  • A drop of hot sauce

Try these flavors with your water, it will add a fancy fun element to the same old, plain everyday water.

  • chill the water in the fridge
  • then add ice before serving

wow guest by having a pretty way to serve flavored water in vintage glasses and pitches.

**Also freeze ice cubes with flavors inside